How can I make my livestream videos look better?
You Are What Your Camera Eats
my first livestream SETUP
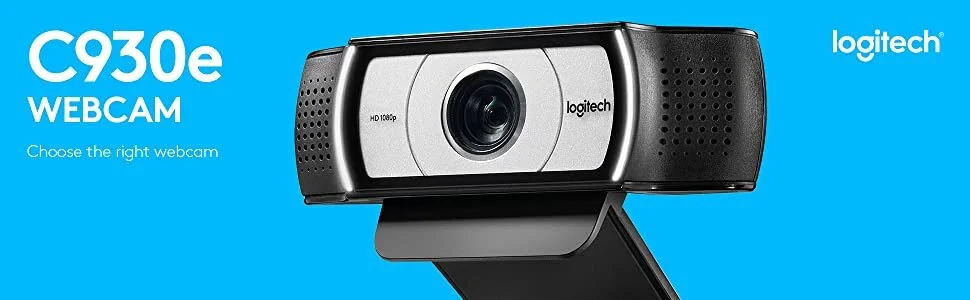
I’ve been doing livestreams on Youtube for a number of years. I’ve found the simplest way to run a livestream is to connect a basic webcam to your computer. These days many computers have built-in webcams. However if you don’t have one, there is a huge selection of different brands of webcams available at all different price points. I first started streaming my YouTube videos with the Logitech C922 Pro Stream 1080p HD Webcam. A couple years later I eventually upgraded and moved up to the Logitech C930 1080p HD Video Webcam because it provides a wider angle of view. While this is the easiest setup, in general webcams don’t provide the greatest looking video image quality. I didn’t really see that much of an improvement moving from the C922 to the C930. I tried adjusting the camera angle, as well as trying various lighting configurations. I even used Logitech’s camera configuration tool, but I just couldn’t get an image that I felt was good enough. I then realized there’s only so much you can expect from a webcam. This wasn’t a matter of low internet bandwidth, as my internet connection is great, and it didn’t matter how I tried to light my room. The camera was the limitation. So I searched online ‘How can I make my livestream videos look better?’ and this lead me to start reading about the world of video capture devices.
WHAT IS THE CAM LINK 4K?
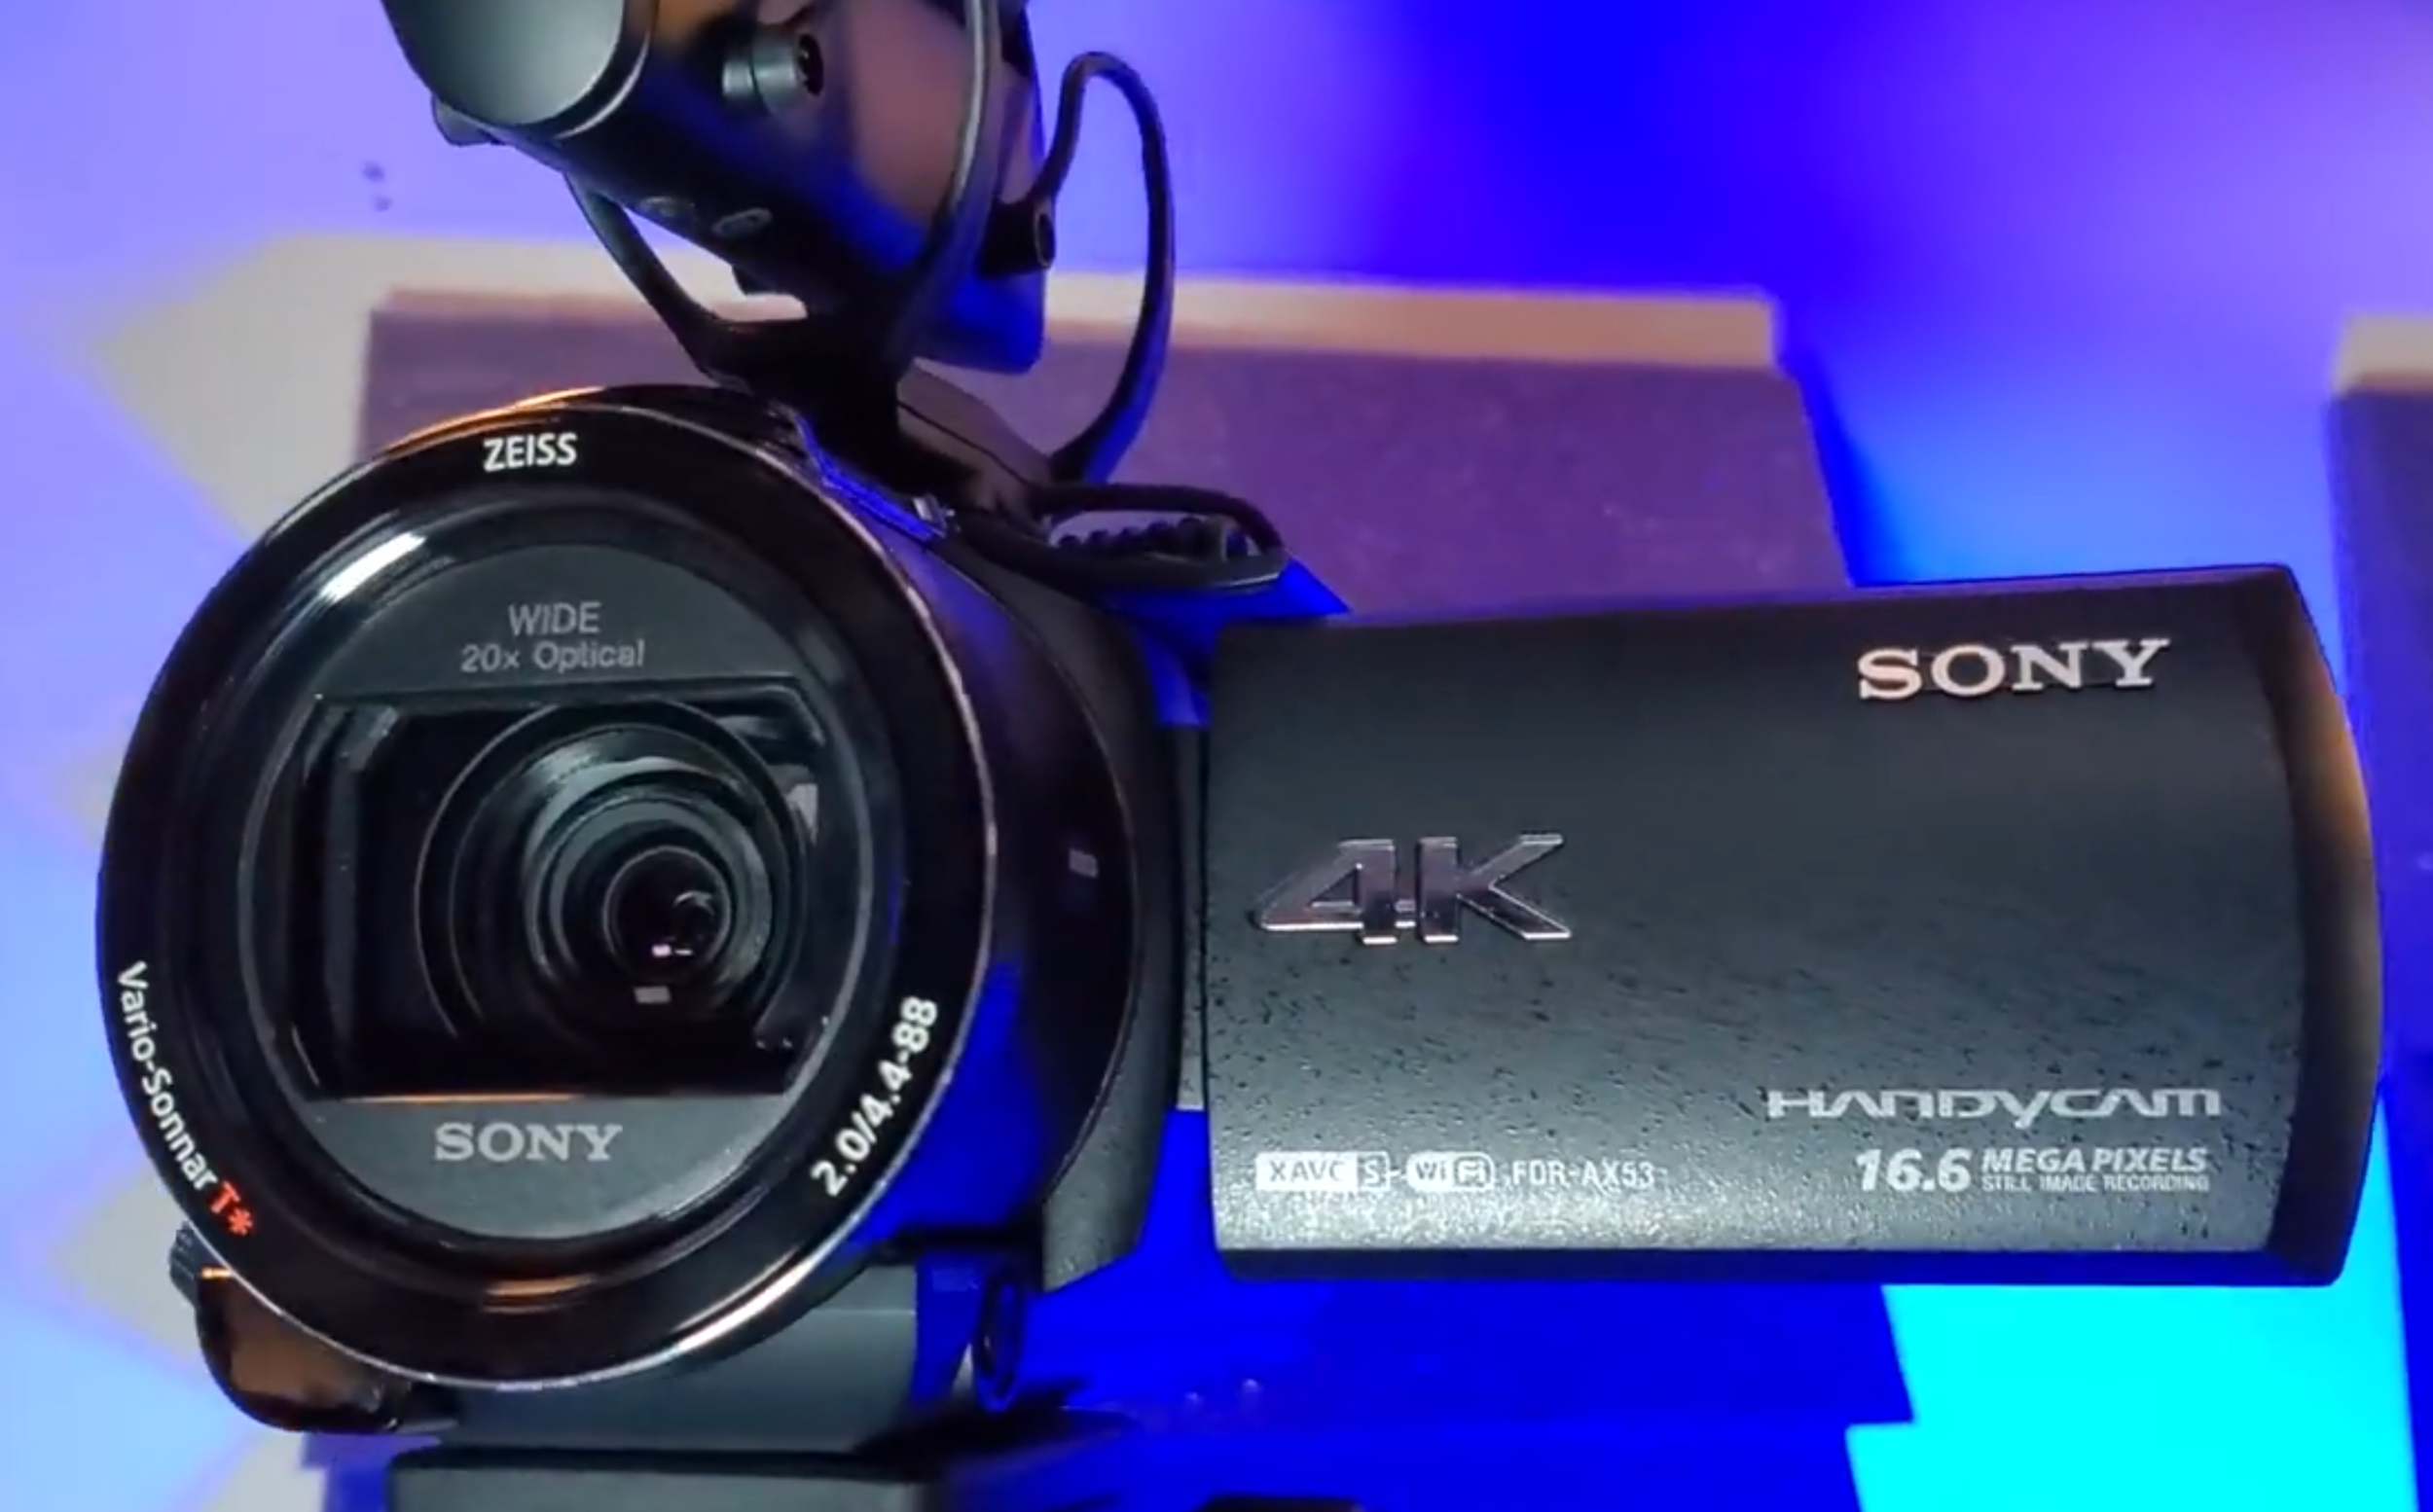
For my regular pre-recorded Youtube videos, I had been using the Sony FDR AX53 camcorder. This had been my go to camera for a number of years and I had always been happy with it’s performance. It offers great video image quality and has the simplicity of a camcorder. You can turn it on and it’s ready to record. This is much simpler than many digital video cameras these days. I wanted to see if there was a way to somehow capture the video from the Sony AX53 and use that in real-time during a livestream. If you take a look, you’ll soon discover that there are a lot of video capture devices on the market. I wanted to find the simplest and easiest set up possible. A bunch of options came up in searches and I chatted with a friend that recommend the Elgato CAM LINK 4K. I had never heard of it, but he recommended it to me because he had also used it with his Sony AX53. So I ordered the CAM LINK 4K from Amazon and it arrived after a couple of days later in the mail.
Features & Specifications
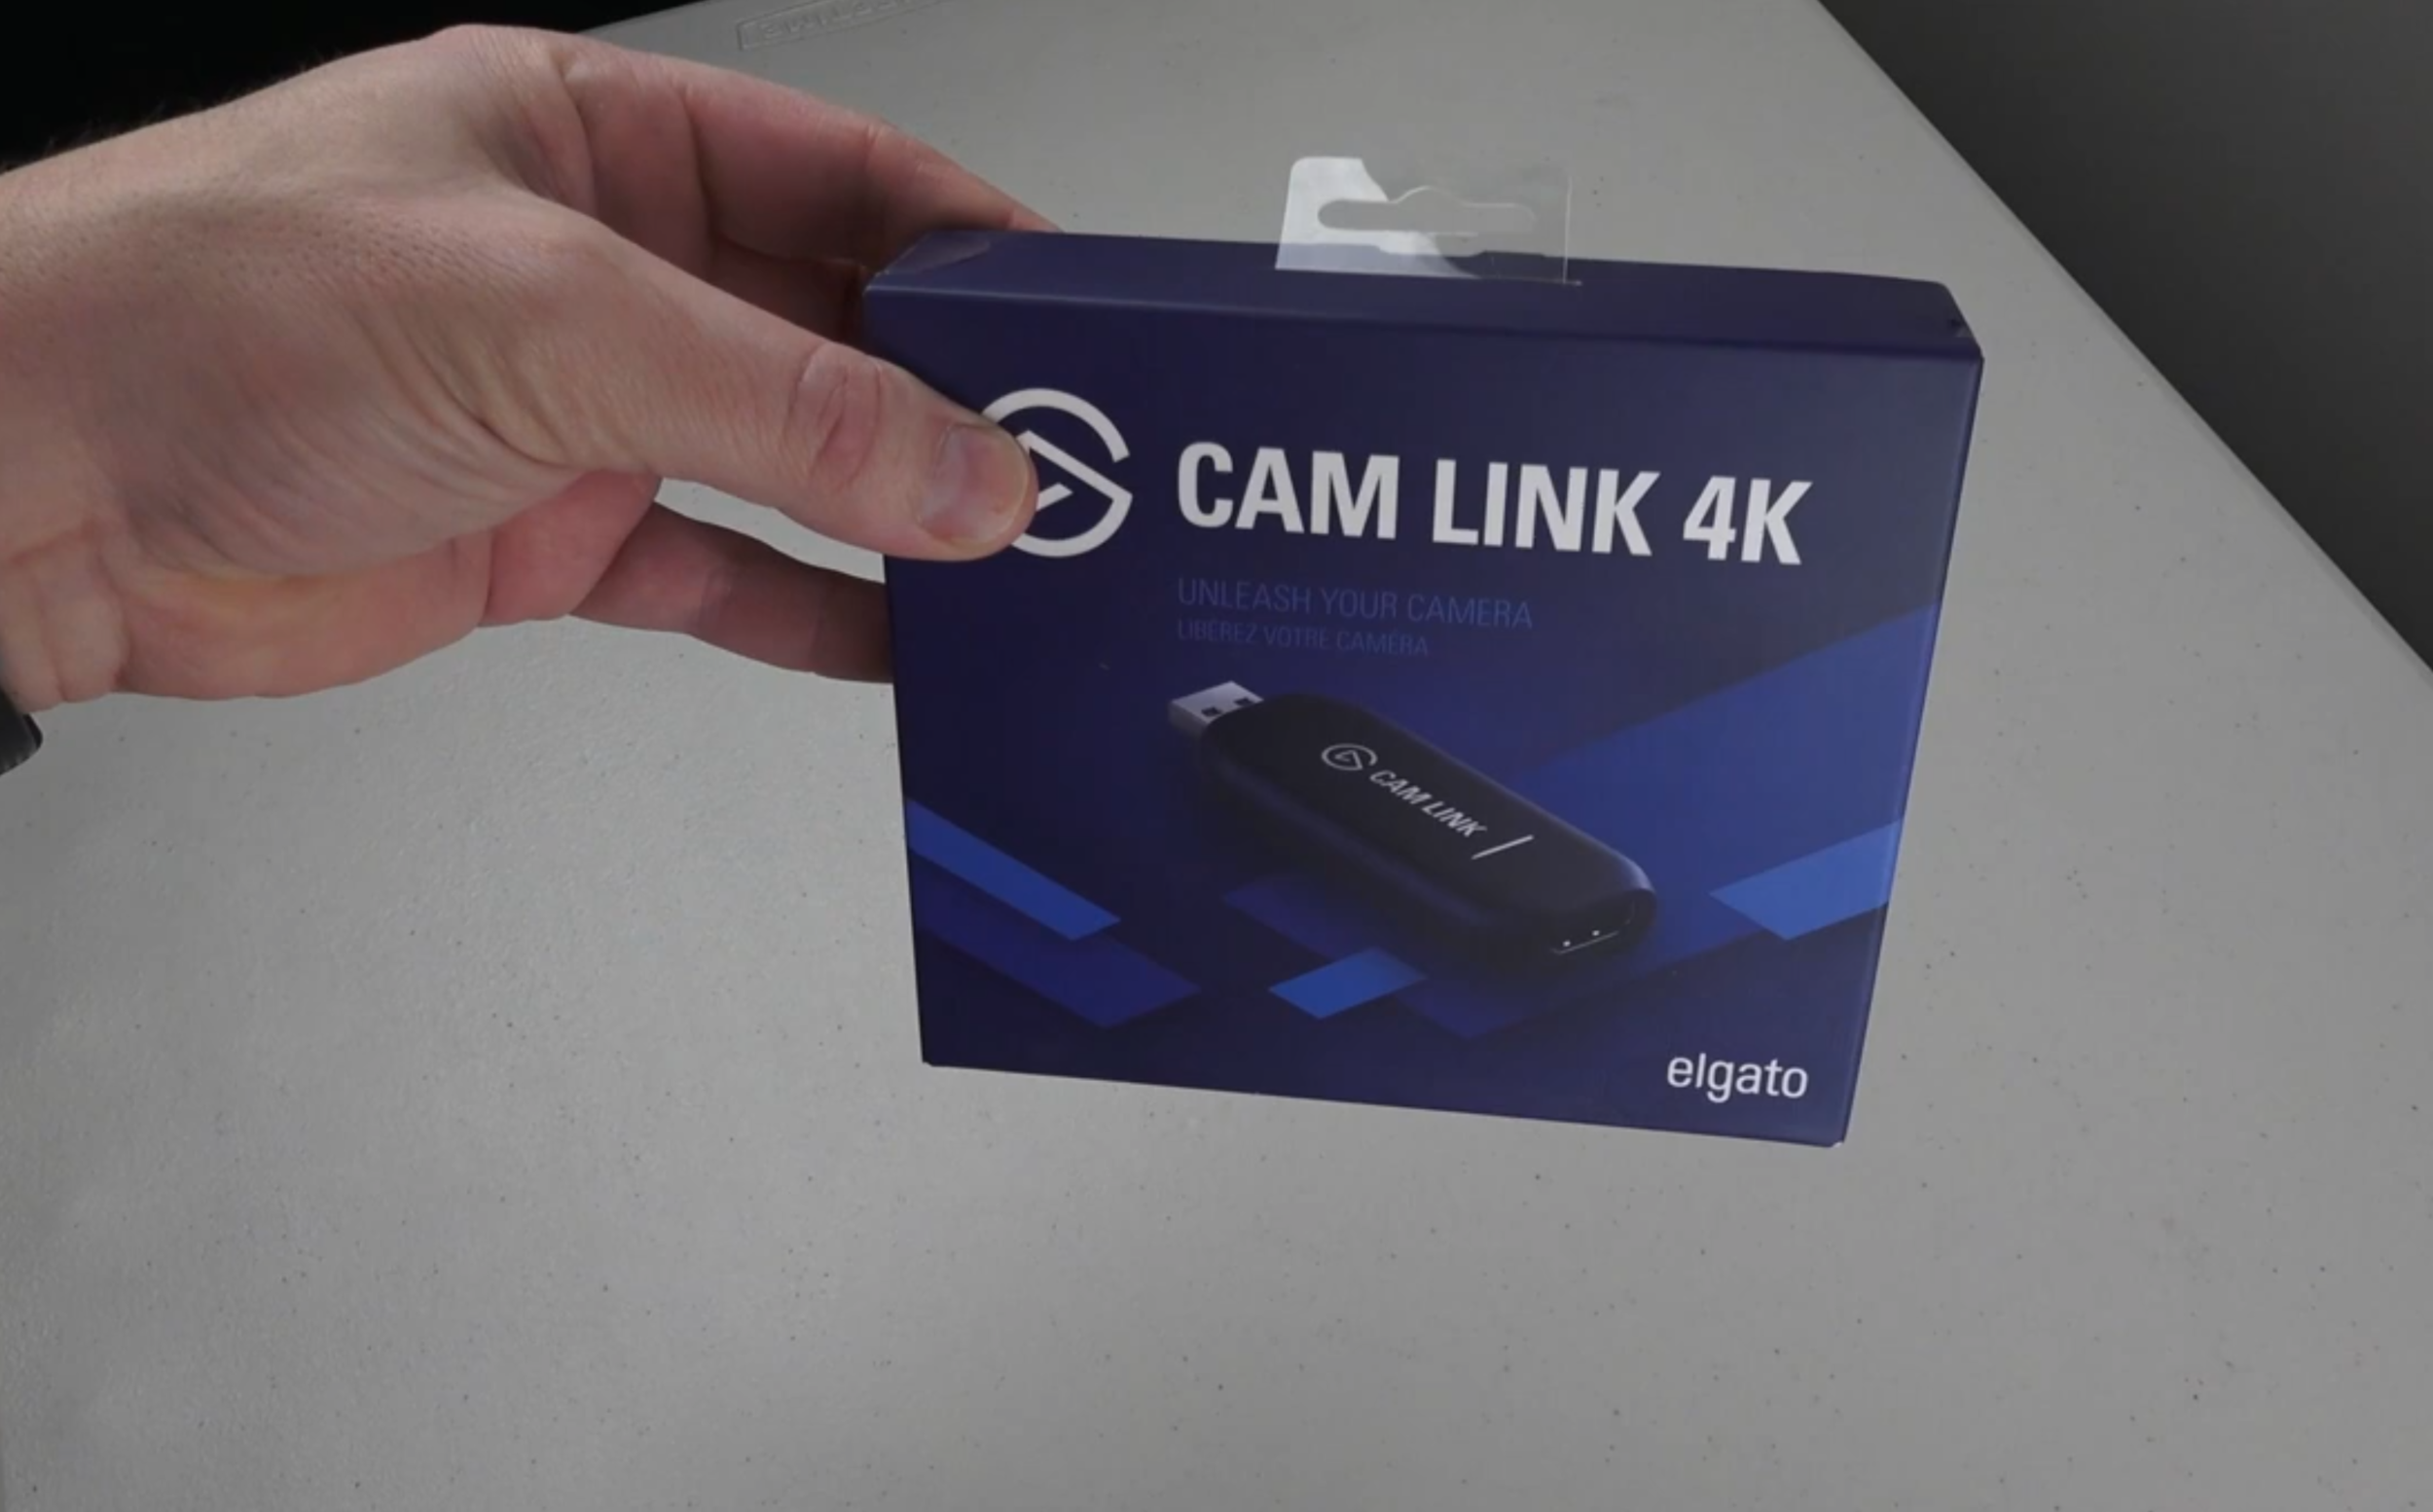
Here is exactly what you will get with the Elgato Cam Link 4K:

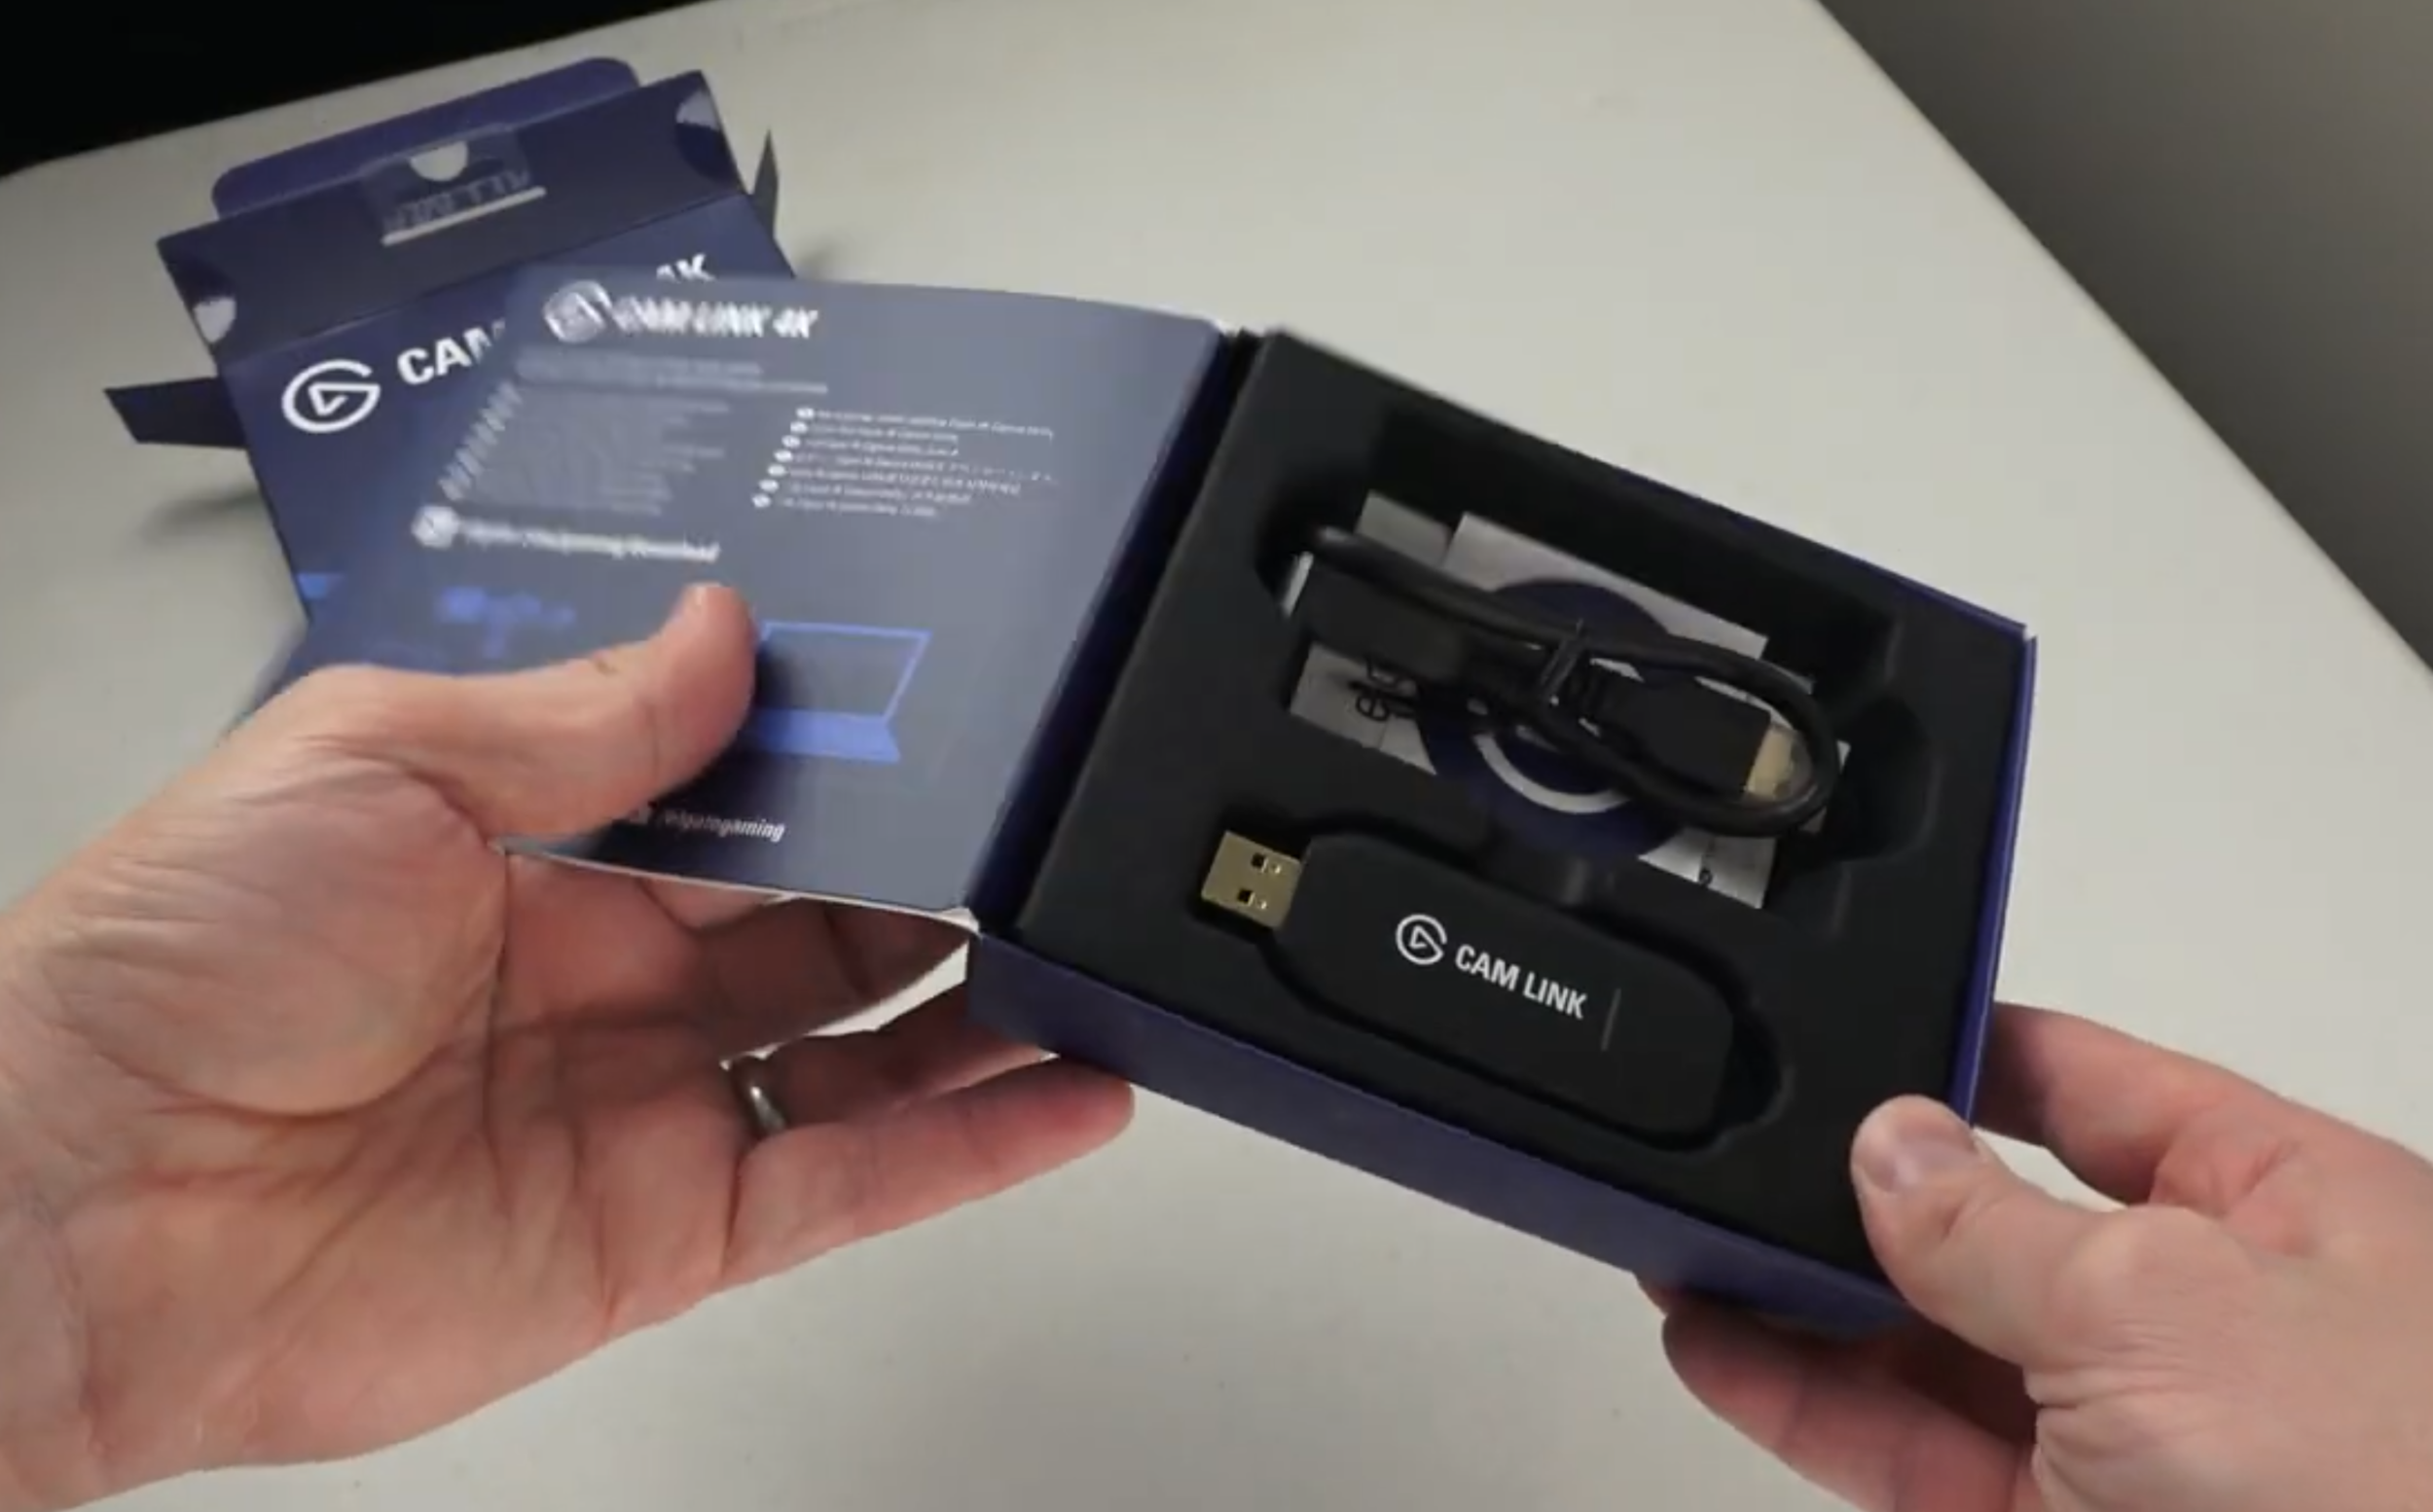
Elgato CAMLINK 4K unboxed
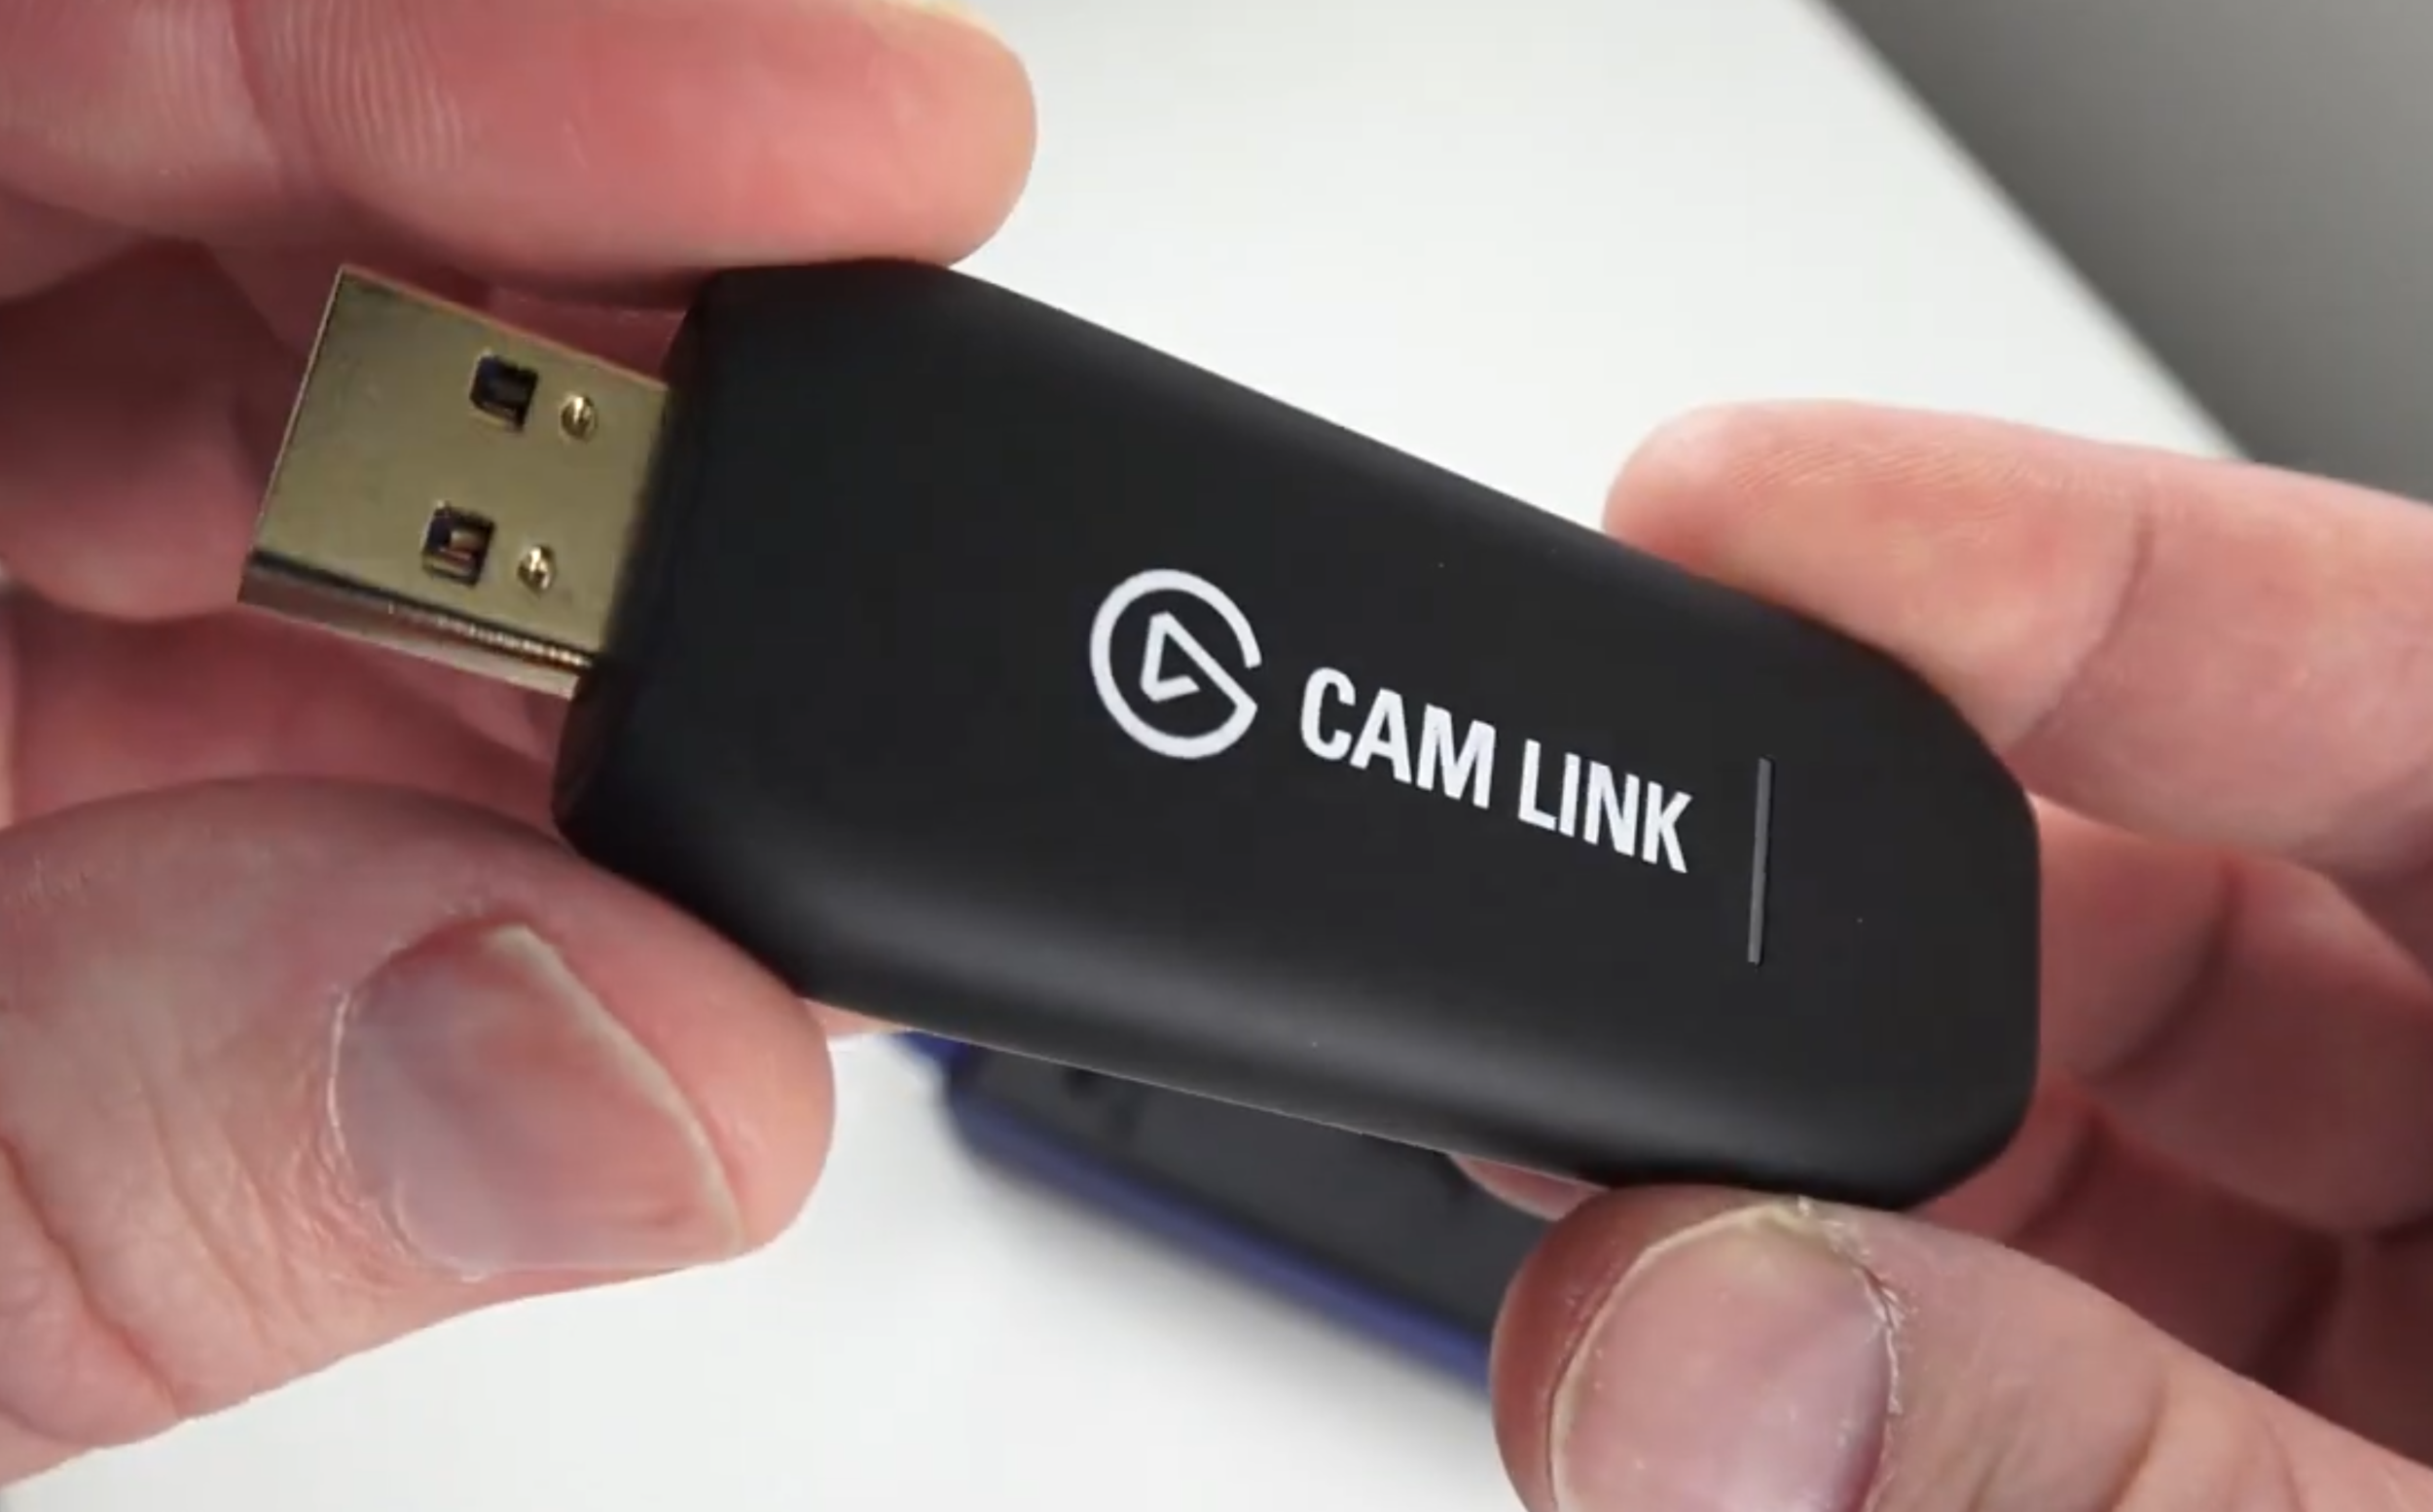
Cam Link 4K adapter
USB 3.0 extensions cable
Quick start guide
And here are the official specifications:
Easily connect your DSLR, camcorder, or action Cam to your PC or Mac
Go live on any platform in no time thanks to ultra-low-latency technology
Broadcast in stunning quality:
1080 P at 60 FPS
4K at 30 FPS
Supported resolutions are 3840x2160 up to p30, 1920x1080 up to p60/ i60
MY NEW LIVESTREAM SETUP & CONFIGURATION
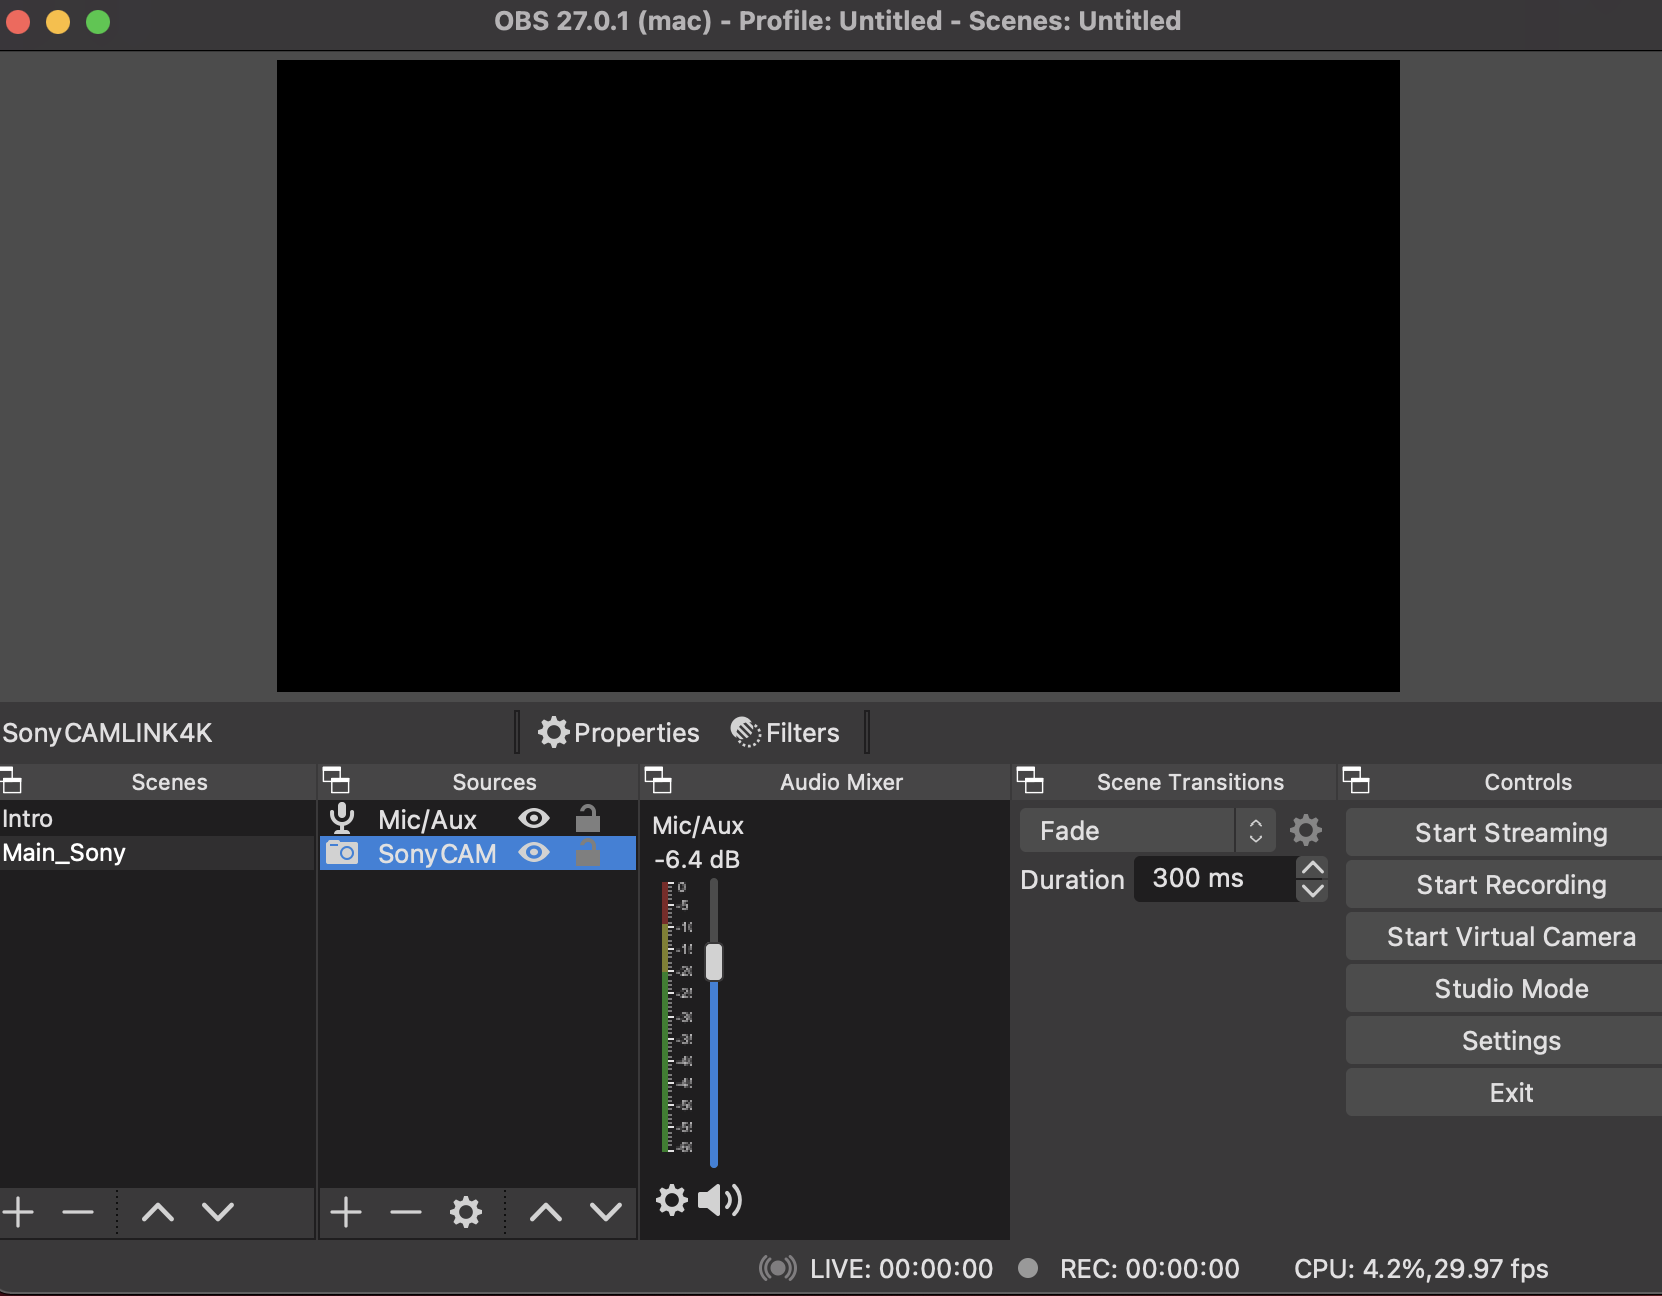
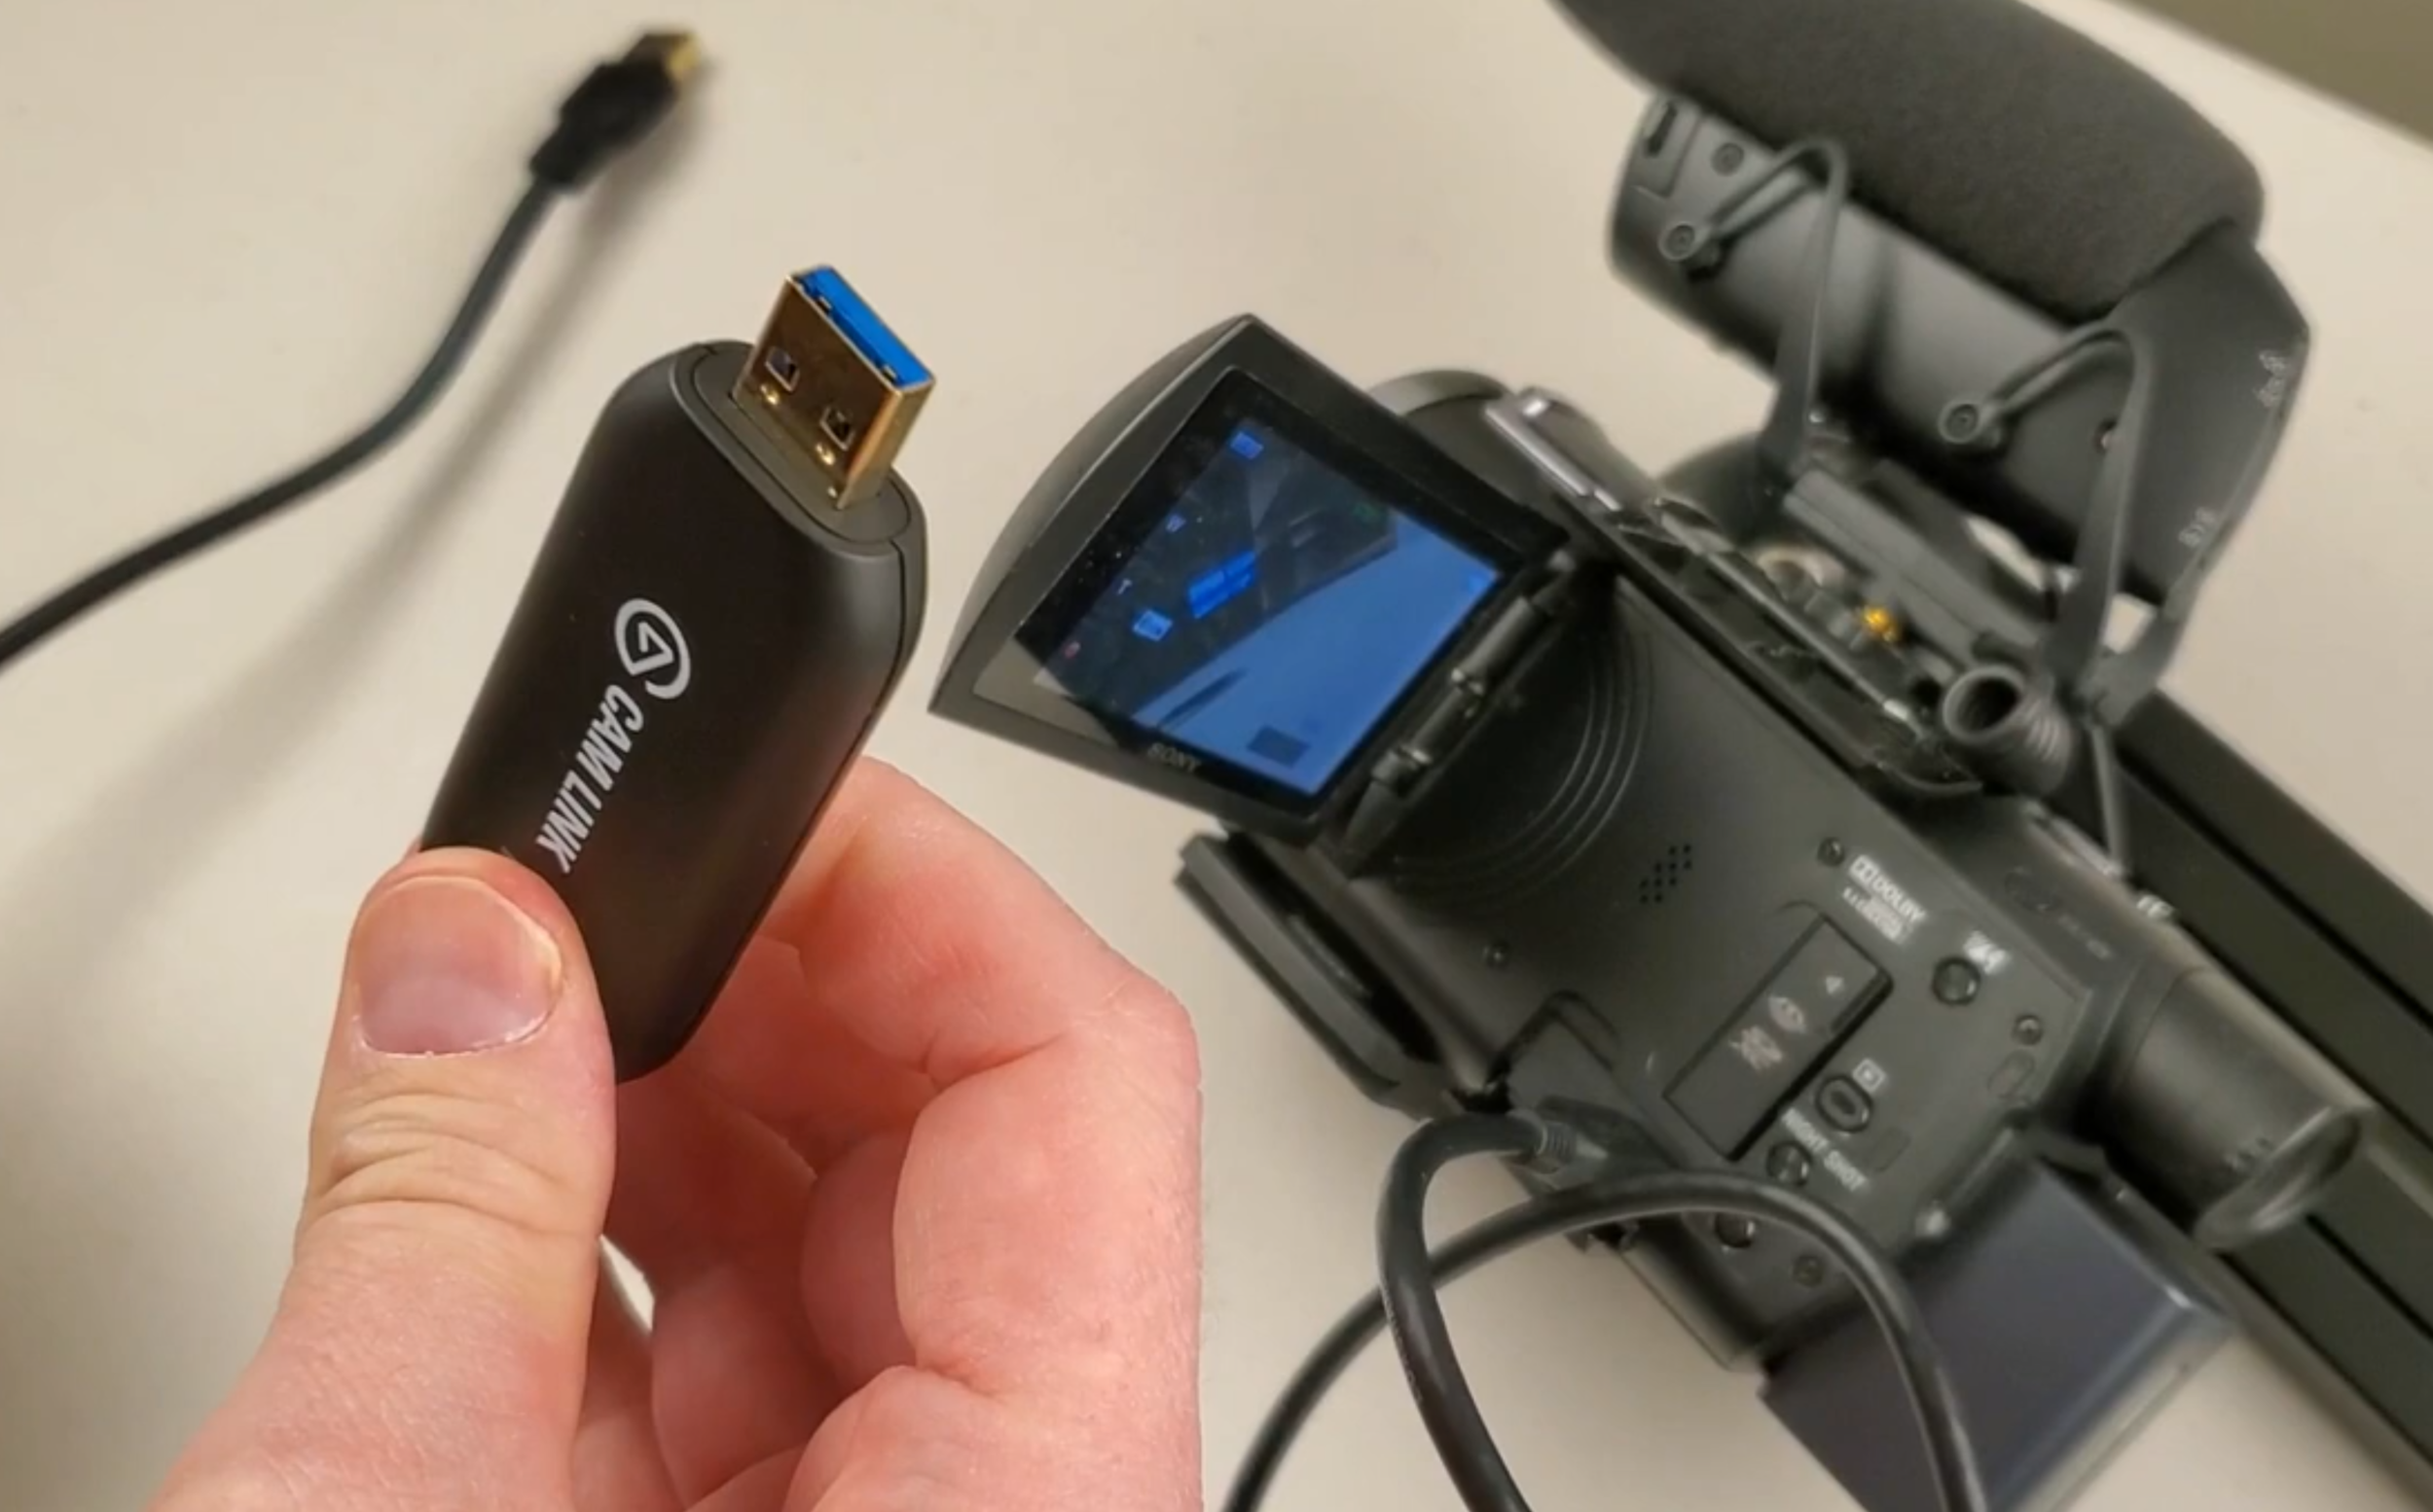
For my livestreams I have always liked to use the free software package called OBS. It offers a lot of great built-in video and audio options and has always run well during my livestreams on Youtube. To use my Sony AX53 camera with OBS, which wasn’t an option before, you simply take the supplied Sony HDMI cable and plug it from the camera into the Cam Link 4K. From here you connect the Cam Link 4K into a USB port on your computer. I’m currently using a Mac Mini 2018 for my livestreams. Now with everything connected, you can launch OBS and the Sony camera will be available as a video source. That’s it! It’s really simple to set up. There aren’t any drivers or software packages to install on MacOS. It is worth noting that the Cam Link 4K is both Mac and PC compatible. I haven’t personally tested this configuration on a Windows PC, but the setup should be similar. There’s always the chance you will need to install some type of USB driver on Windows. Elgato does recommend that you connect the Cam Link 4K to a USB 3.0 port on your computer. I haven’t tried using a lower speed USB port, and I don’t recommend trying that. You want the full bandwidth provided by a USB 3.0 port, so make sure you use that option.
SIDE BY SIDE COMPARISON
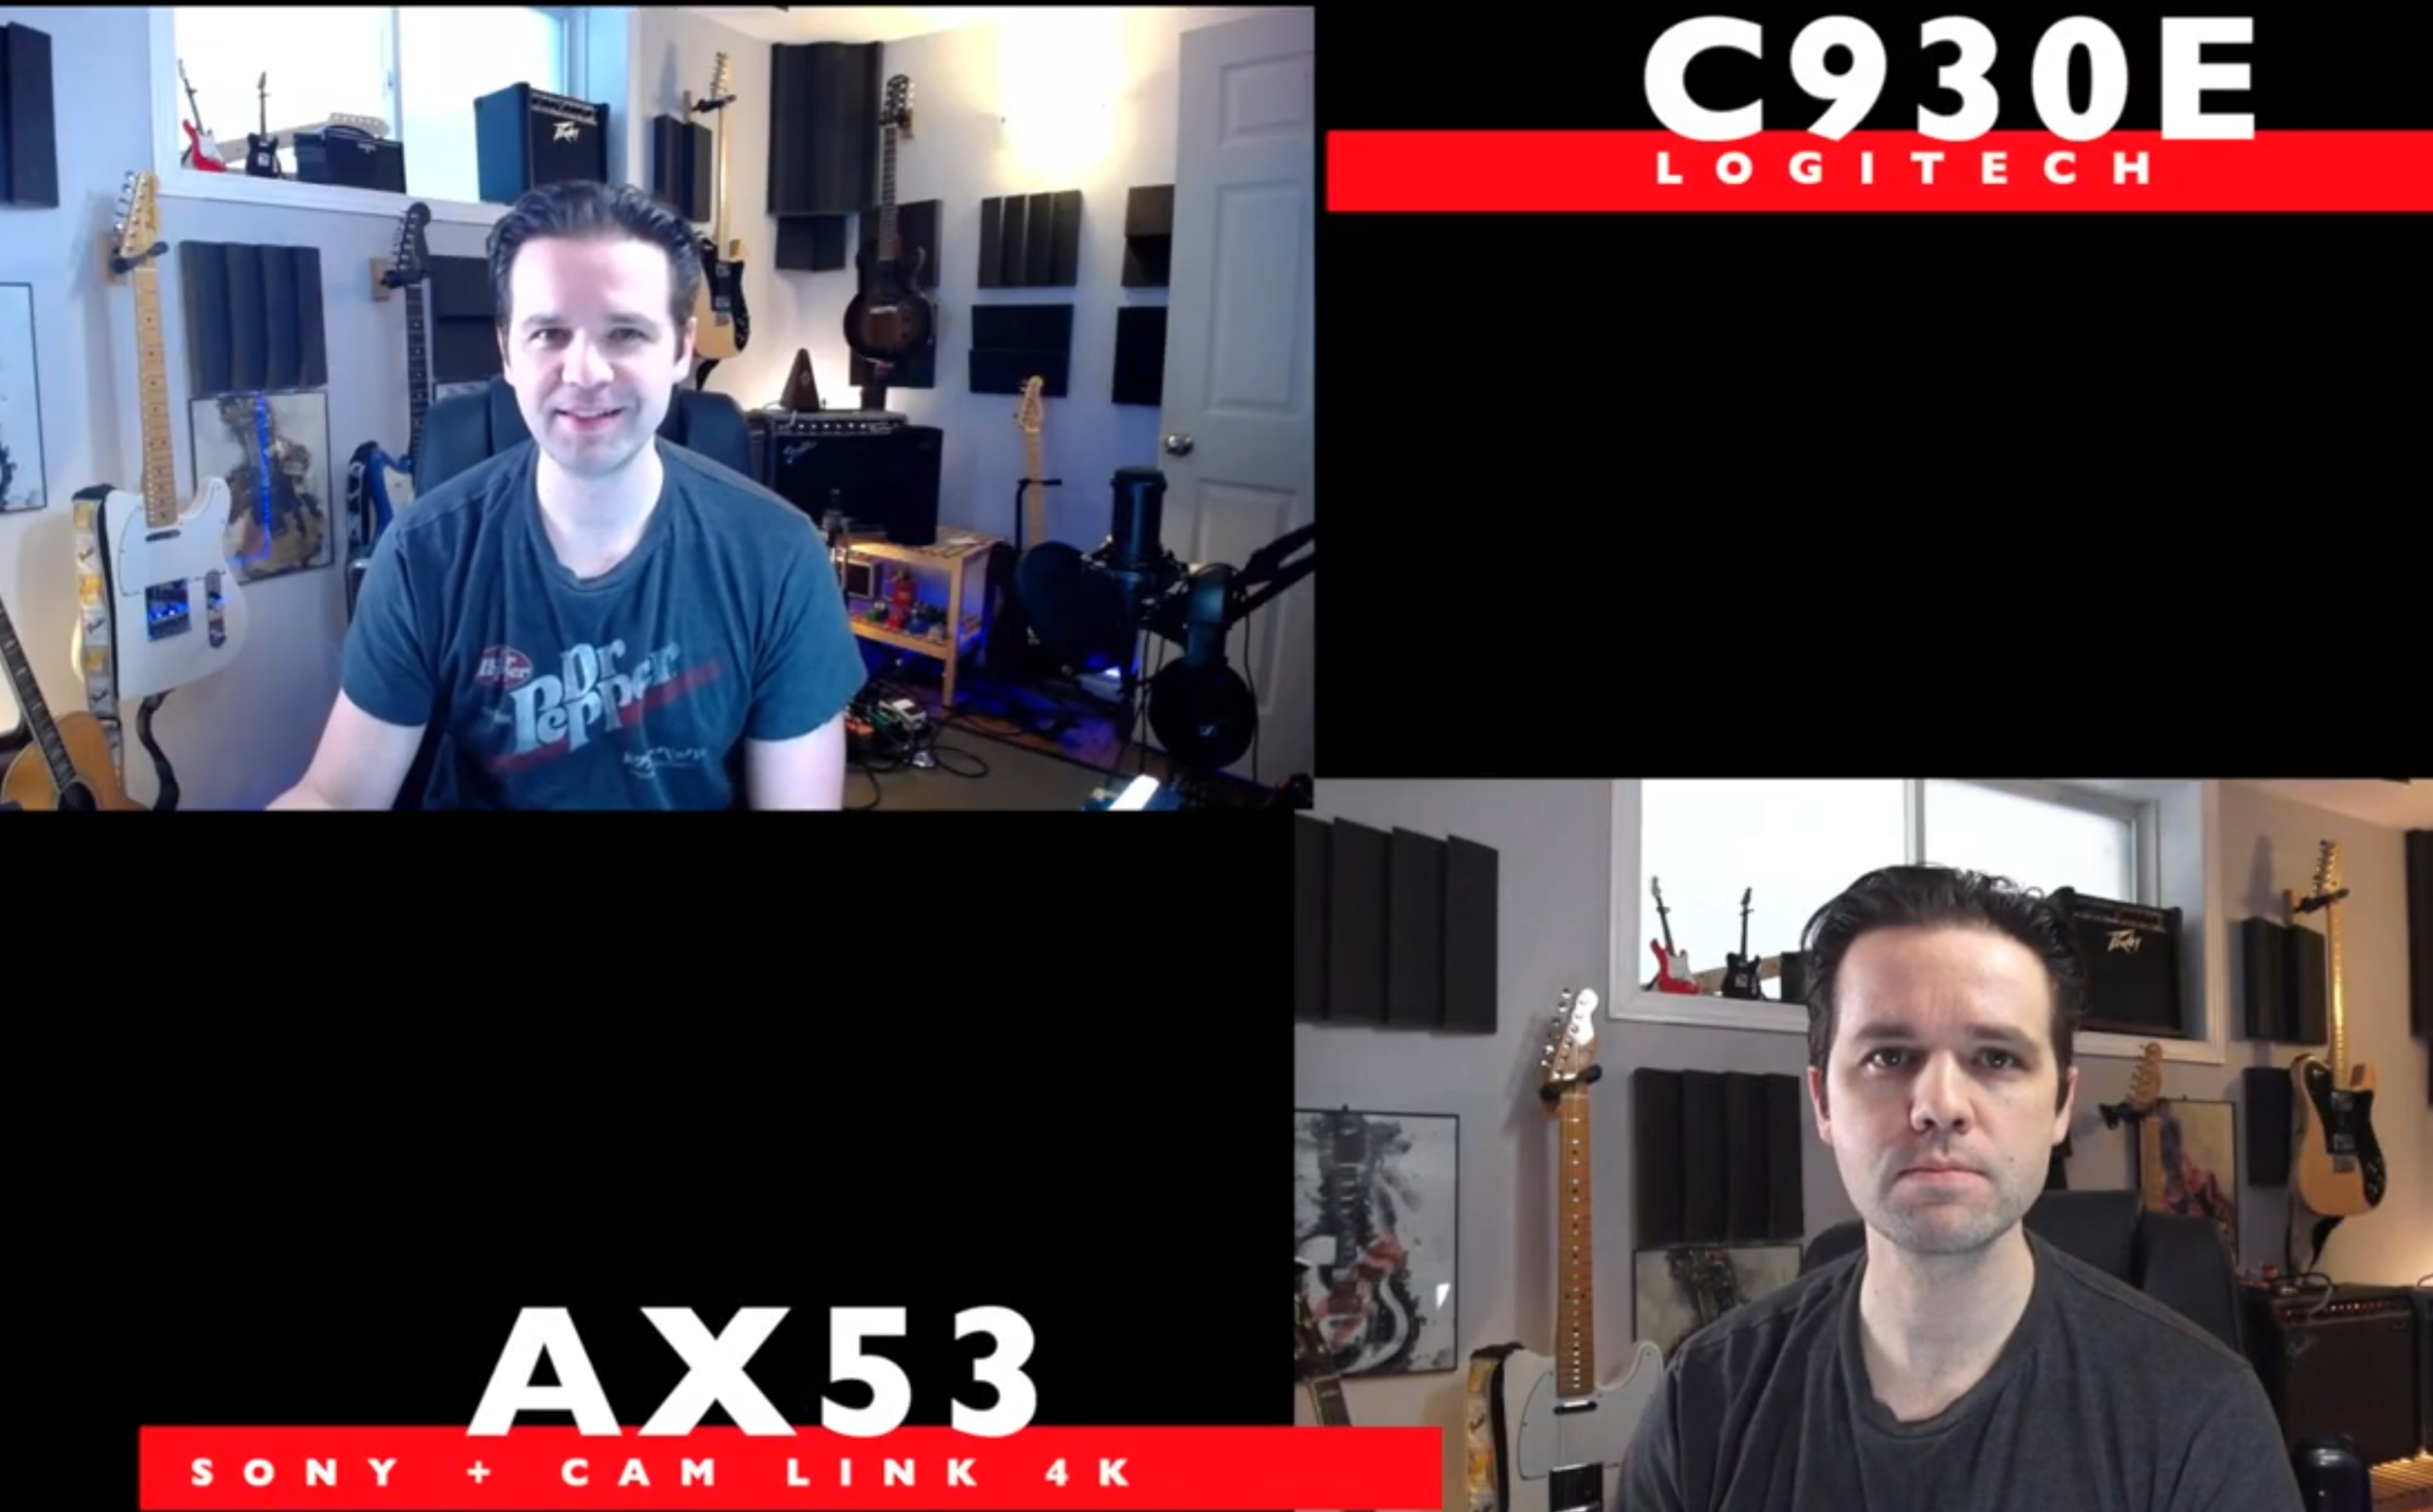
You really need to see the Cam Link 4k in action during a video to fully appreciate what it can do. I’ve experienced no lag, stutter, or any technical issues while using it during live streams on YouTube. You simply plug it in and it works! Take a look at the image comparing the Logitech C930E webcam video quality, next to the Sony AX53 camcorder video quality. You can easily see the increase in quality while using the Sony AX53. A better way to see a direct comparison is to watch my review video on my YouTube channel called Lando27Tech. Take a look at my video called ‘Upgrade Your Livestream Quality with the Elgato CAM LINK 4K’. You can see everything I’ve talked about in this this blog and see it all in action.


